Wednesday, May 09, 2007
Teddy Pictures - For edited three times
The edited photos are on flickr because when I try to upload them I get a - Internet explorer cannot display the web page - message. Sorry about the inconvenience. http://www.flickr.com/photos/30497913@N00/
Final Pictures
Here is the link to my blog with pictures and comments. I hope you like it. I enjoyed this class and Ill be sure to mention it to others. Thank you.
-Dave
http://fsdaa6.blogspot.com/
-Dave
http://fsdaa6.blogspot.com/
My Edited photo - three ways
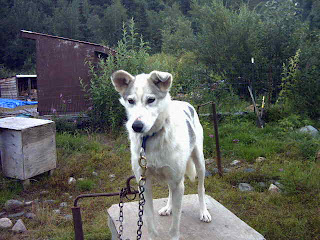
I LOVE my puppy!! Teddy is a bloodhound that we got from Texas from a rescue place that was specifically for hounds. I love this photo of him because he is always so curious and I love photos where he looks interested in something, but his nose isn't pressed to the ground (I can actually see his face to photograph here)
The first edited photo is very warmified. He is a bloodhound, but he is mostly brown. When that redish color is taking over the picture I feel like it has a more houndish feel.
In the second photo I wanted to basically show how much I do love my pup. I wanted to make him the focus of the picture. I faded out the area around him and added a bit of glow.
The third picture is a basic black and white. I love to experiment with black and white and although I didn't have a specific purpose in mind I feel like photos just have a different feel to them when they are in black and white.
You are going to have to look at them on flickr because my computer is not cooperating at the moment!
My Edited photo - three ways
I LOVE my puppy!! Teddy is a bloodhound that we got from Texas from a rescue place that was specifically for hounds. I love this photo of him because he is always so curious and I love photos where he looks interested in something, but his nose isn't pressed to the ground (I can actually see his face to photograph here)
The first edited photo is very warmified. He is a bloodhound, but he is mostly brown. When that redish color is taking over the picture I feel like it has a more houndish feel.
In the second photo I wanted to basically show how much I do love my pup. I wanted to make him the focus of the picture. I faded out the area around him and added a bit of glow.
The third picture is a basic black and white. I love to experiment with black and white and although I didn't have a specific purpose in mind I feel like photos just have a different feel to them when they are in black and white.
You are going to have to look at them on flickr because my computer is not cooperating at the moment!
The first edited photo is very warmified. He is a bloodhound, but he is mostly brown. When that redish color is taking over the picture I feel like it has a more houndish feel.
In the second photo I wanted to basically show how much I do love my pup. I wanted to make him the focus of the picture. I faded out the area around him and added a bit of glow.
The third picture is a basic black and white. I love to experiment with black and white and although I didn't have a specific purpose in mind I feel like photos just have a different feel to them when they are in black and white.
You are going to have to look at them on flickr because my computer is not cooperating at the moment!
How my camera works...
This is for a Canon Power Shot A540
ISO
1. Use arrow buttons to select an ISO speed and press FUNC./SET button.
2. Selecting (Auto) sets the optimal ISO speed according to the light level when shooting. Since the ISO speed setting will automatically be raised in dark places, the camera will select a faster shutter speed and reduce the chances of camera shake.
3. in M mode, ISO Auto is not available.
Color Balance
1. Unsure about this one, but posted a serarate post on it.
Exposure Compensation
1. Turn on the LCD monitor
2. Press the +/- button several times until the exposure compensation bar is displayed.
3. Use the arrows to adjust the exposure compensation and press the +/- button.
4. Depending on the shooting mode pressing the +/- button will switch between the setting items as follows:
SCN - SCN Mode/ Exposure compensation
TV - Shutter Speed/Exposure Compensation
AV - Aperture valure/Exposure Compensation
5. To cancel the expoure compensation restore the compensation value to 0.
File Size and Compression
1. FUNC. Menu (recording pixels)
2. Compression
3. Use the arrows to select recording pixel/compression settting and press he FUNC./SET button.
4. Values for compression settings
Superfine - Shoot higher quality images
Fine - Shoot normal quality images
Normal - Shoot more images.
Exposure and Meter Mode
1. P, Tv, Av, M
2. FUNC. Menu (evaluative)
3. Use the arrows to select the metering mode and press the FUNC./SET button
4. Metering Methods
a. Evaluative - Appropriate for standard shooting conditions including back lit scenes. The camera divides images into several zones for metering. It evaluates complex lighting conditions, such as the position of the subject, the brightness, the direct light, and the back lighting, and adjust the settings to the correct exposure for the main subject.
b. Center Weighted Average - Averages the light metered from the entire frame, but gives greater weight to the subject matter at the center.
c. Spot - Meters the area within the spot AE point at the center of the LCD monitor. Use this setting when you want to set the exposure on the subject in the center of the monitor.
Macro Focusing
1. Could not find in the manual
Flash Mode
1. Could not find in the manual
My Flickr Site!
I believe I have posted this before, but here it is again! I also have a myspace acount and facebook acount. I will be posting pictures on there as well. Look me up under Kaleigh Lambert
Why Do I Share?
I share photos for many different reasons. At this point in my life I guess the number one reason would be because I am 5000 miles away from home in Alaska! My family and friends are definitely my audience with all of my "tourist" pics :-). I love to share these experiences with them. I would like to expand my audience to everyone available on the Internet. Posting online, and sharing pictures online is new to me, so it is fun and exciting to explore all the sharing possibilities. I am a Christian and I want to share my faith with others - in a non pushy way - through photography. I love to share the things I see with people and it is very exciting to hear peoples feedback on photos I have taken. I also love to write poetry. Photos and poetry go very well together, so that is another road I can go down as well. I am very excited about my options.
Editing Workflow
I am still VERY new at photoshop, but here is my basic workflow from the beginning:
1. Choose photo
2. Decide what my original intention with the photo was and can I edit it to reach that intention.
3. Choose new direction if necessary
4. Crop
5. Straighten
6. Adjust levels
7. Highlights
8. Use clone stamp if necessary
9. Sharpen - if needed
While I am still in the beginning stages of editing with photoshop my workflow may include testing out B&W strategies, and other interesting effects. This is the same with Picasa. I like to try out some of the more interesting options, just to see what can be done. I also tend to overdue some of the editing - like with sharpening and highlights - for example. I really like to see exactly what the tools can do! This is a very exciting process!
Tuesday, May 08, 2007
where you can find my pictures
Well if anybody wanted to see the pictures that i shared in class. you can find them here at flickr...
http://www.flickr.com/photos/7234245@n02/?saved=1
http://www.flickr.com/photos/7234245@n02/?saved=1
Friday, May 04, 2007
Make up Work Week 13! Here are the photo web sharing sites where i put my photos!
Here are some of the photo sharing sites that i put pictures to share with my friends and family and to the public.
http://www.flickr.com/photos/tng/
http://viewmorepics.myspace.com/index.cfm?fuseaction=user.viewPicture&friendID=69842515&albumId=31720
http://viewmorepics.myspace.com/index.cfm?fuseaction=user.viewPicture&friendID=69842515&albumId=829483
http://s48.photobucket.com/albums/f227/fstng/
http://www.flickr.com/photos/tng/
http://viewmorepics.myspace.com/index.cfm?fuseaction=user.viewPicture&friendID=69842515&albumId=31720
http://viewmorepics.myspace.com/index.cfm?fuseaction=user.viewPicture&friendID=69842515&albumId=829483
http://s48.photobucket.com/albums/f227/fstng/
Make up Week 12 Sharing Photographs!
The reason why i share my photographs is because I like others to see them and make any comments that would help me take better photos in the future! I am kind of new to taking photos and i try to take a picture of stuff that i did or something that is out of the ordinary. My audience is pretty much my friends and family, but i am willing to share my pictures with anyone who is interested in looking at them. I am motivated in sharing my photos because it will help me get any feedback from my peers on improving my skills at using a digital camera! I have gotten some good pointers from my peers since i have begun to share some of my most recent work on the internet. I found them to be very useful and i am more motivated to go out and try to take more photos to add to my collection to share with my audience.
Make up work Week 10! A better detailed edited workflow!
Here is more detailed work flow! I did add good detailed on how i did my edited work flow! So i had to work on another edited work flow with better descriptions on how i edited my photos. I have messed up on my last edited work flow and came up with a better one.
Photo #1
Photo #1
This is my original photo!
Here is my edited photo!
How i did my work flow
1.) I went to create new fill or adjustment layer and chose Brightness/Contrast after creating a adjustment layer.
2.) I set the brightness up to +70 and i set the contrast to +29.
3.) I have created another adjustment layer and set the Input Levels -0.95-253 and the output
levels at 0 - 253 on the RGB Channel.
4.) I have set the curves on another adjustment layer set at Input -111 and output 123.
5.) My edited photo now looks brighter and has more detail and looks better compared to my original photo.
Photo #2
My Original Photo
My edited photo

How I edited my dog photo!

Here is my edited photo!

How i did my work flow
1.) I went to create new fill or adjustment layer and chose Brightness/Contrast after creating a adjustment layer.
2.) I set the brightness up to +70 and i set the contrast to +29.
3.) I have created another adjustment layer and set the Input Levels -0.95-253 and the output
levels at 0 - 253 on the RGB Channel.
4.) I have set the curves on another adjustment layer set at Input -111 and output 123.
5.) My edited photo now looks brighter and has more detail and looks better compared to my original photo.
Photo #2
My Original Photo

My edited photo

How I edited my dog photo!
1.) I went to Image-Adjustments-Curves and set the Input at 121 and the Output at 95.
2.) I set the color balance levels at
Midtone - cyan-red- +33
magneta-green-+13
yellow-blue- +10
Highlights- cyan red- +32
magneta-green- -16
yellow-blue- +10
3.) I created a adjustment layer and set the brightness at +9 and the contrast at -4.
4.) I used the magnetic lasso tool and selected the dog and made him not so contrast by going to
Layers- Mode - Multiply and i have closed the dialog box.
5.) I added more color in the background and the contrast on the dog is not so bright and has more color and detail compared to my original photo.
My make up work week 8! My Edited and Enchanced Photo!
This is before


This is after!
I have used picassa to help make this picture brighter since the old picture was too dark and i have used the fill color tool in picassa to brighten this photo and i have used the auto contrast features in picassa to enhance my photo. These features are pretty cool, but i think it will be better to use photoshop to help fix up this photo!
My Final - Kool Pictures
I decided to share my photo’s @ flickr, and also through my website I have been working on for weeks; day and night and I do mean that!!! I am not selling anything on my site, just trying to have fun. I enjoy 4 wheeling and mechanics; I like getting my truck muddy, it is truly a blast!!! I am planning on making my Toyota truck into a rock crawler, after I graduate and move to Arizona... Have a great summer!!!

Offroad4fun.net
Wednesday, May 02, 2007
My Final Photo Portfolio!
Here is the link to my final photo portfolio if anybody wants to look at them!
http://viewmorepics.myspace.com/index.cfm?fuseaction=user.viewPicture&friendID=69842515&albumId=851175
http://viewmorepics.myspace.com/index.cfm?fuseaction=user.viewPicture&friendID=69842515&albumId=851175
Final Portfolio
Hey all, here is the link to my final photo set...
http://www.flickr.com/gp/88932770@N00/80435x
go ahead and check it out, and feel free to leave comments!
http://www.flickr.com/gp/88932770@N00/80435x
go ahead and check it out, and feel free to leave comments!
Final Photos...sharing to the public
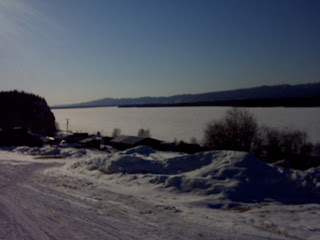
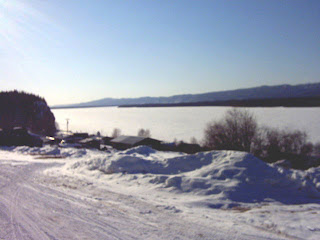
My final photos of what I wanted to share, I had to think about this for awhile, and yet when it came down to it, I thought of where I have lived....from Detroit (Motown) to Missoula, Montana to Fairbanks, Alaska....
soon to be in a year and half on the East Coast somewhere
http://www.flickr.com/photos/msuspartygrnwht
soon to be in a year and half on the East Coast somewhere
http://www.flickr.com/photos/msuspartygrnwht
Sharing portfolio
Well, my shutterfly was acting up last night...but flickr saves the day!
Here is the link to my flickr ablum
http://www.flickr.com/photos/brian_sparks/
Most are my trip from Vegas...have fun!
Here is the link to my flickr ablum
http://www.flickr.com/photos/brian_sparks/
Most are my trip from Vegas...have fun!
Sharing Photographs
I have neither Blogger nor personal web site nor Picasa Album account. Here is the URL to my Flickr account: http://www.flickr.com/photos/7183516@N05/ I have uploaded more photographs and will be sharing the final portfolio using Flickr.
Final Photos
Friends, Moments to cherish!
http://picasaweb.google.com/bupbup777/FriendsMomentsToCherish
These are my moments throughout the semester that I have come to like out of many friend photos!
http://picasaweb.google.com/bupbup777/FriendsMomentsToCherish
These are my moments throughout the semester that I have come to like out of many friend photos!
Tuesday, May 01, 2007


Subscribe to:
Posts (Atom)